Sunday, December 3, 2017

THE FINAL WRAP UP


Okay, okay, I know it's been three years since my last post. So I'm going to bring you up to date as the bus is 95% completed. That last 5% will probably never happen. We returned to Michigan in mid-May 2015. I still had a big To Do list. At the top was finishing the closet doors and cabinets. I had all the drawers installed, so I just needed to complete the drawer faces and the closet and cabinet doors. 

I cut the doors and drawers and routed 3/4' radius edges. Then installed all the hinges and mounted the doors and drawer faces to get everything aligned. Then uninstalled all the hardware to ready for paint. I removed all the drawers and installed all the handles and latches, then removed them for painting.

 
I primed all with four coats of automotive fill primer and sanded from 220 down to 600 grit to get a flat, grain-free surface. Mark then shot them with an automotive enamel. He did an awesome job, as usual. The finished product - very shiny. Actually looks like laminate.

Here is the final tour of our 4104. In my opinion, the best-designed bus ever and a quintessential example Streamline Moderne design.

I had to wait awhile before posting this. Our bus is featured in the April issue of Bus Conversion Magazine and I promised to hold off until the article was published. Here's a link to their Facebook page. https://www.facebook.com/BCMagUSA/

As Forest Gump's Mom said, "Life is like a box of chocolates..." Since starting this project in 2011, a lot has changed. Both sons and families now live in the San Francisco Bay area and we have spent the past three winters there. There are about seven RV parks in the Bay Area. All but one require your rig to be less than ten years old. Even though our bus is essentially new as of 2012, we are barred from those parks. We also got turned away from a KOA on the way out this year - same policy. So,,,,,,,, we just purchased a new 27' Airstream. We're still living in the bus at present but plan on moving into the Airstream in a month or so. If you're looking for a nice retro RV, there's one for sale.



Sunday, December 13, 2015

LIVE'N ON THE COAST - 2014]

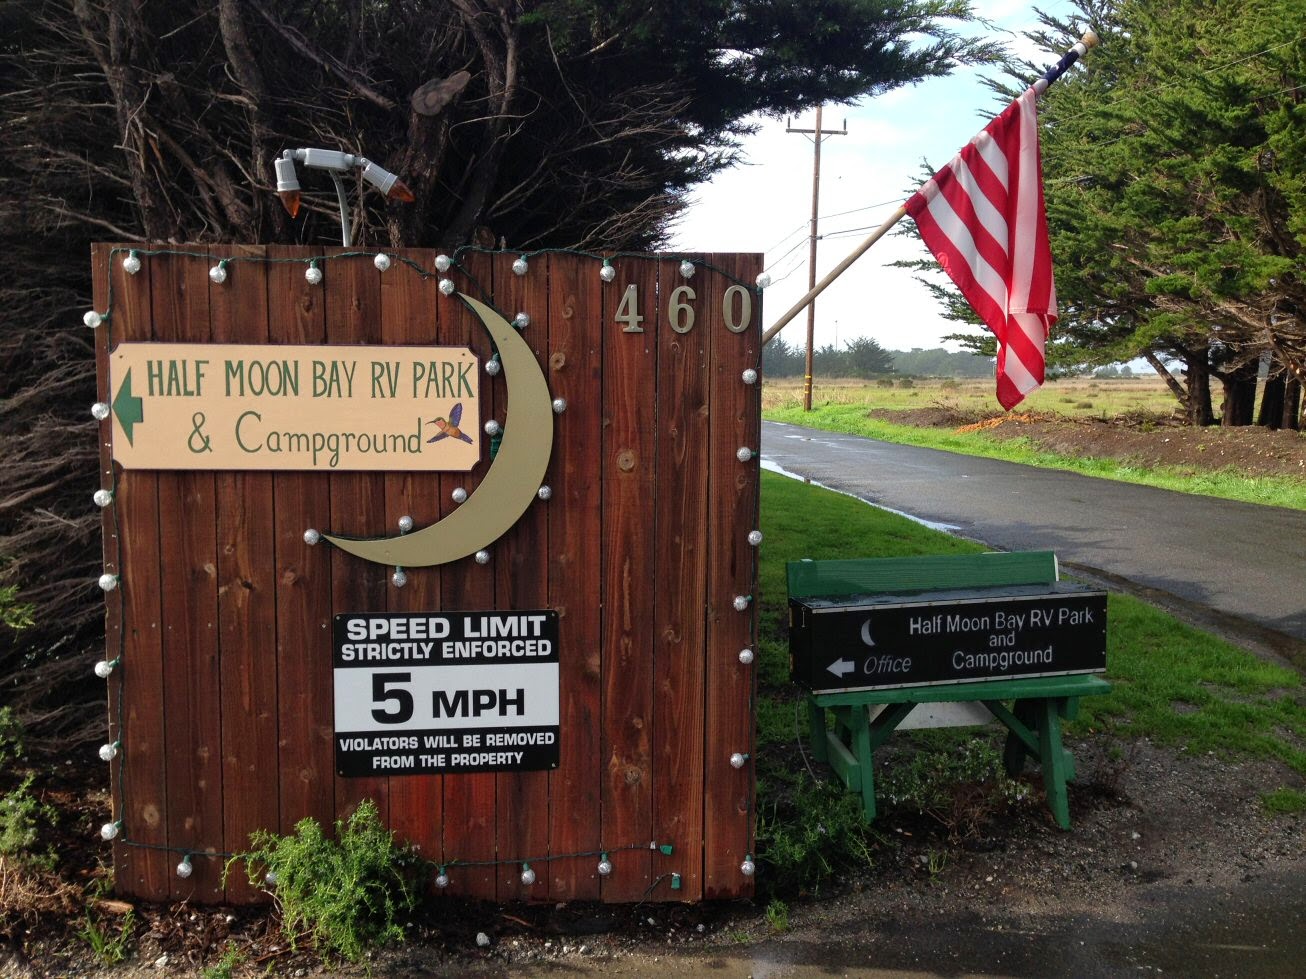
I have been completely derelict in my blogging for several months. Actually about a year. A lot has happened as you might guess, so I'm going to split this up into sveral parts. Yeah, I'm lazy and don't want to write the whole thing at once. We lived for three months at the Half Moon Bay RV Park in - you guessed it - Half Moon Bay, California - population 12,013. 

The park is a very laid back place compared to some we contacted. There's a limited number of RV parks in the San Francisco area and many have rules that exclude any RV older than 10 years. I tried to explain that the bus is essentially brand new - even emailed pictures. In the end, this was the best park we could've picked along the coast. When you enter the park you're greeted by a vintage Airstream which serves as the park hangout/lounge.


They put us on the busiest corner of the in the park. We think it was to add to the motif. So, we saw all the comings and goings in the park. Every now and then somebody would stop by to check out the bus. We had great neighbors and staff. The park is a little over a mile from tow
n and a quarter mile from the beach. It's usually a 20 minute drive on Highway 92 to the kids. I say usually, because on a nice weekend that same drive can take up to two hours. There are only three ways to get to Half Moon Bay - Highway 1 North, Highway 1 South, and Highway 92 from San Mateo. It's essential that you check traffic on the Google Maps app before getting on 92.  


With the park's relaxed rules, I was able to work on the bus the whole time we were there. The first project was to rewire the cooling fans on the radiator. As you may recall the fan thermostats could not take the heat and their circuit boards fried. I'd made a temporary fix on the way out, but I needed a permanent fix. I wired an available switch on the driver's console to a starter solenoid back in the engine bay. I needed a reliable 40 amps continuous back there. I added a solenoid to feed 4 awg wire to a fuse block and then 8 awg to each of four radiator fans. While I was on a wiring binge I installed new 4/0 cable on all the house batteries. I read an article on the best way to wire the house batteries. I had them wired in parallel in a daisy chain. I rewired them to a central lug bar with even length connections and then to the inverter. Now all batteries have the same charging and discharging amps rather than the closer ones giving and getting more of the load and charging respectively.
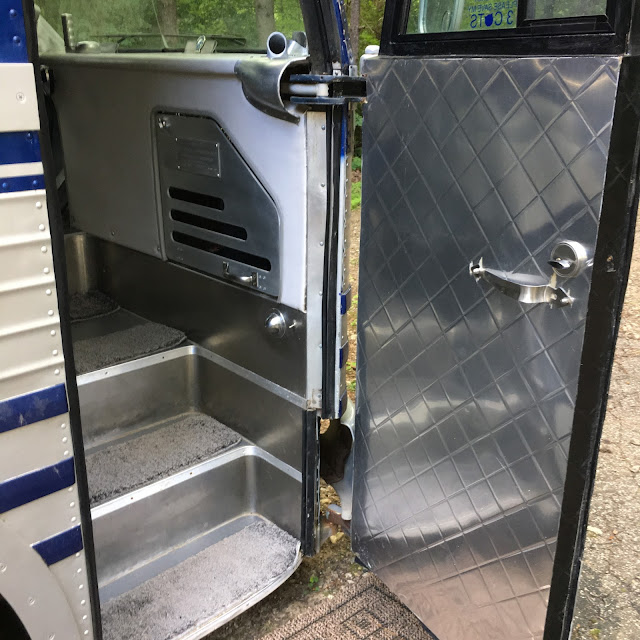
Other improvements included refinishing the entry steps, adding an outside outlet, and some interior painting. 

This is what living on the coast is like.


We were able to take the bus to The Pacific Coast Dream Machines event. A combination custom car, motorcycle, airplane, stationary engine, and anything else powered by an engine show. A taste of Dream Machines:


B-25


My California girls


One of five P-51's


We headed home the end of April, stopping 4 days at Yellowstone. Hung out with all the wolf watchers that assemble every spring to.... watch wolves, and bears, and bison, and elk, and all sorts of wildlife right from the road!


 Next, The Summer of 2015.

Saturday, February 7, 2015

OUR SECOND TRIP WEST

The exterior is painted, the rear "window" painted and sealed, all the other windows re-installed with proper seals as well as the front door. Repairs to the plumbing from last winter's brutal cold are completed. We are ready for our second expedition West. We're leaving later this year and staying longer. A ten day window of warm weather, like 60's and 70's in January in the Prairie States! We plan on staying in California for three months, then head slowly home; stopping in Yellowstone to see the spring gathering of elk, bison, and wolves.

We left Thursday, January 22nd. The plan was to drive six to seven hours a day and take a week or so the cover the 2306 miles from Augusta, MI to Half Moon Bay, CA.


As Teri often says, "We don't go on trips or vacations, we go on adventures." Day one was uneventful. We drove from Augusta to Davenport, Iowa (313 mi. - 6 hrs.). Weird punctuation huh? Up early at 8:00 am sharp we were on the road by 9:00. We drove for six hours in Iowa and made it into Lincoln Nebraaaaaaaaaska and called it a day (356 mi. - 7 hrs.). Weird punctuation huh? Up at 7:00 am because we were still on Michigan time. We drove from Lincoln to North Platte. Only 250 mi. Still in Nebraaaaaaaaaska. Here is one of the more scenic sections of Nebraaaaaaaaaska. And another one with a car going down the road!


We finally escaped the "N" state, and on to Wyoming! Well as far as Cheyenne, that is. Began having several electrical issues. The "Engine ON" switch failed. The relay was working, so I connected the wires to a different switch and all was well - for awhile. Next I noticed the temp gauge was about 10 degrees above normal and on long uphill grades it would move even higher. These old Detroit Diesels don't like temperatures above 180*F. Why don't they have a degree key on the keypad? I use it a lot and it's not always possible to plug in a "special character". As if the degree symbol was a special character. So I just use the asterisk. It's close enough for me so get used to it. Anyway, I went back to the engine bay and poked around, Come to find out, two of my four cooling fans weren't running. Further investigation revealed that the thermostat circuit boards were fried. I mean all burnt up. SO... Off with the engine bay door. I cut the wiring to all the circuit boards and ran hot wires directly to each fan. I had inline fuses for each, so I just pulled the fuses whenever we stopped. I'll rewire the whole thing when we get to California.

The next leg of our adventure was from Cheyenne to Rock Springs, Wyoming - 305 mi. We had a series of incidents here. First, the alternator died. I'm driving along checking my gauges regularly, when I notice ZERO Volts on the gauge! We pull of at the next exit and right into a truck repair shop. There is no one ahead of us, so we pull into the garage. The alternator is toast and it's way hotter than toast! The mechanic looks at the alternator (probably a circa 1980's) and kinda shakes his head. "Only seen one of these [Detroit 671] engines before. I'll bet parts are hard to find." This puts me in a not very optimistic mood. He puts on gloves and removes the HOT alternator, puts it on the bench, goes over to his "alternator shelf" which has about five alternators on it, and grabs box. He opens the box and takes out a 160 amp, perfect fit alternator. He swaps pulleys, bolts it in and attaches the two wires. I give him a lot of money, hit the START button, and see 13+ volts on my gauge. Forty five minutes and we're back on the road with a 50 amp bigger alternator.

As we're approaching Rock Springs, Teri says "Shouldn't we stop for fuel?" I say "We should have plenty, but we'll stop soon and top it off." These old buses don't have fuel gauges. Guess what comes next? Go ahead - guess. Mike Mike Mike Mike guess what comes next? Yup, we run outta fuel. This is not a good thing and it's even worse with a diesel engine. Sometimes getting it started again can be a real project. I call road service and a half hour later a guy shows up with 20 gallons of fuel. I open the engine bay and remove both fuel filters. They're both empty - not good. If the fuel line is empty too, it's going to be a project getting it started. I filled both filters with fuel and screwed them back on. We poured the rest of the 20 gal. in the tank. I get in and push the start button and... nothing. Dead battery. I should say batteries, since the bus has two 8D (125 pounds apiece) batteries. The road service guy is well prepared. He has an on-board, gas powered DC generator! We jump it and it fires right up. I thank him profusely, and pay him a lot of money. Then I say, "do you have any 8D's back at the shop. He calls the shop and they say they can have them by 8:30 am. So, we find an RV park and stay the night. 

Next morning the batteries arrive at 11:00 am on the dot. We have been parked at the truck shop since 8:00. I go to move the bus. Batteries totally dead. We swap them out. The originals are ancient. I fire up the old 671 again. Everything is AOK. I give them more money and we're off again. After a hundred miles or so, I notice the engine is staying a lot cooler. Then it hits me. Electric fans, dying alternator, ancient batteries, low amperage output, slow running fans. Funny how bad things turn out good sometimes. Wyoming into Utah, past Park City. It does not look like a good year for that famous Utah powder. No snow along the highway and it looks like most of the snow on the slopes is man-made. Down through Salt Lake City and out onto 100 miles of perfectly straight and perfectly flat Interstate. In the winter the west end of the salt flats flood with about three inches of water creating perfect reflections of the horizon.


We stayed in Wendover, Nevada that 
night. When we registered the clerk was all amazed because we had stayed at the same place exactly one year ago on our way home.


Reno

Wendover


We crossed Nevada uneventfully, pulling into Reno that night. Next morning we made the final leg to Half Moon Bay.


Google view of Half Moon Bay RV Park and Campground.


Next the RV park and more. Plus repairs and upgrades!

Wednesday, December 3, 2014

LIGHT AT THE END OF THE TUNNEL

So when I last posted, we had just finished painting the entire bus silver below the roof line. It was time to lay out the graphics and add the deep cobalt pearl. Once again, preparation is 95% of the job. The graphic is a blue stripe running the length of the Bus with a "swoop" coming down and then over the rear wheel. In addition two silver accent stripes run inside the blue. The roof was already painted white and masked off before the silver went on to protect from over-spray.Then the blue was taped out using "fine-line" tape. This tape is plastic and comes in varying widths from 1/8" to 3/4". Fine-line gives you a sharper edge and can be laid around curves without wrinkling. So, we laid out the blue with fine-line, adjusting by eye, the curve of the swoop. We then went back and,
using regular 3/4" masking tape, laid it tight to the inner edge of the fine-line. This gave us a perfect 3/4" spacer from the edge of the blue. We then laid down another 3/4" fine-line along the inside of the spacer tape. Once that was completed, we went back and removed the spacer tape. The 3/4" fine-line will be silver once all the tape is removed. With one side completed, we had to transfer the design to the other side; duplicating our pattern by measuring key marker
points along the first graphic to the other side. Yes, I know you can't see both sides of the bus at the same time, but exact duplication was important to us. Additional taping was required to create the graphics for the front of the Bus. Once the tape was laid out, we went back to add paper to mask off the remainder of the silver on the Bus. Total time taping - one week. 

Next, the exposed surface (that not covered by tape or paper) was Scotch Brited (a verb commonly used in body shop lingo) to promote adherence of the blue paint. That was followed by a complete wipe-down with wax and grease remover. Finally, the blue was shot, but the adventure wasn't over yet. The tape had to be removed before the paint was dry, so we could remove any over-spray around rivets and panel seams. You do this by using a very small folded corner of T-shirt cloth, dip in lacquer thinner, and gentle wipe the over-spray into the heaver blue paint inside the tape line. Tedious. 

The wheels had at least five coats of paint on them. Factory white, maroon, and then three more coats of brushed on white. I started out sandblasting which worked great around the lug nuts, but was too slow to do the whole wheel. Next, I used aircraft paint stripper. It took three applications followed by sandblasting the remainder and I had one wheel done. This wasn't cutting it - literally. Mark had a nonfunctional, air powered needler, so out of desperation, I disassembled it, cleaned and polished all the parts, oiled it up and got it
working again. For the uninitiated, a needler is a tool with eight or so 1/8 inch rods about 6 inches long that are held in a tight bunch and alternately hammered at high speed by the air cylinder inside the tool. It pulverized the thick, hard paint in no time. I got the other three wheels down to bare metal in the time it took to do the first one. I sandblasted the lugs and nuts and they were ready for paint. One coat of etch prime, two coats of white sealer, and two coats of white single stage. They look like brand new and factory correct.

I put new glass in the stock rear view mirrors and mounted them along with about fifteen other trim pieces. They all bolt on with 1/4" stainless flatheads. 

I had been pondering how to get the the engine bay door to fit better and also have better access to the engine. The original hinges are really difficult to adjust, and you're always ducking under the door; not to mention the number of times my head has clipped the sharp corner when the door is up. So I made it totally removable by taking the hinges off, welding two locating pins on the bottom that drop into two holes in the top of the
bumper. Then I found these cool marine latches to secure the top edge of the door. A simple four post trailer plug hooks up all the lights in the rear. Total weight of the door - about 25 pounds. Now it fits perfectly. I can remove it and set it aside. And, the new latches look very cool.

The original rear window of the Bus was a three piece unit with a locking bead window seal. The glass is convex in both the vertical and horizontal

planes. So it's biconvex. They don't make these windows anymore. Everyone says they're made of unobtainium. The donor bus had all three windows in the back. One had a crack in one layer of the laminated glass, but otherwise was intact. I had already filled the back window with 1" foam board, so I had the option of installing the original glass using a rope gasket, make a fiberglass copy of the original glass, or make the "window" out of some other material. After failing at getting a smooth fiberglass copy and deciding the original glass would have to be installed and then covered with acrylic to hide the crack, I decided to go with FRP - fiberglass reinforced plastic. It's about 3/32" thick and smooth on the back side. The only issue here is that you can't bend in in two directions - biconvex. I laid made a paper template of the three pieces and cut the FRP to shape. By bowing the plastic in the vertical plain and angling slightly the two side panels, I got a great looking back "window". I seam sealed the edges, painted the FRP flat black and screwed an aluminum trim piece down the two side panel seams. Done and looks great.

Next, I installed all the exterior lighting. That's 22 lights. The four corner upper marker lights are original. The original front and back triple light castings were used, but I replaced all the lens with "beehive" LED's with cool chrome visors. The side markers are 2" round LED's with custom Deco trim I designed with a CAD program and had water-jet cut out of 1/8" aluminum. I polished these parts to chrome-like finish. I also drew up a vent cover for the propane furnace and had that water-jet cut as well - also polished bright and shiny. 

So, the last job to get the Bus roadworthy again was to re-install the big side windows and a new window for the door. There are seven side
windows. I installed rubber seals on all seven windows, Then Mark and I hung them on the hinges and using a little Pledge for added slipperiness got them snug in their openings.

End result, bus looks pretty good. Right?


Monday, October 13, 2014

LOVE - HATE RELATIONSHIP

The Shop last Spring
While we did most of the interior work last year with the Bus outside, at our house, I needed a place to work on the exterior that would not be ruled by weather. I found the perfect building only ten minutes from home - a 56' x 60' pole barn built about six years ago and situated on two acres of land. The building has two 14' high doors at opposite ends plus two 7' conventional garage doors to the side bays. One bay we've converted to a paint booth with radiant floor heat, super insulation and
Interior
excellent airflow. Mark and I have a couple of cars waiting for restoration down the road - a '70 Chevelle Malibu SS, a '68 Torino GT, and a '39 Ford 2 door street rod that my oldest kid and I finished the first time around in 1990. Anyway, back to the Bus. I moved it over there in late June to restore, prep and paint the exterior. I've had three "deadlines" pass and it was still not in full primer. Once again, a project I underestimated x10. I bought this particular bus because of the fresh engine and
Distorted  panel
 
suspension. If I had it to do over, I may have taken a closer look at just how rough the exterior was. Here is one example of a panel that had to be replaced. Note the bulging between rivets. Electrolytic corrosion occurs between the steel backing panel and the aluminum outer panel, forming a white power oxide that expands to a greater volume than the metallic aluminum, pushing the two metals apart. Since aluminum is more malleable it deforms, causing the bulging between the line of rivets. Solution - remove the aluminum skin, apply a layer of undercoating to keep the two metals 
Corrosion under panel
electrolytically separated, and replace with a fresh panel from the donor bus. Many points of steel / aluminum contact were separated by what looks like tar soaked cloth at the factory. You can see some bulging of the panel above, but there are limits to the amount of rebuilding possible These buses were magnificently engineered, but I doubt those engineers expected them to be on the road almost sixty years later. My original plan was to retain the anodized aluminum bottom half and paint
Corrosion barrier applied
the upper half, but there were way more defects in the skin than I had originally realized, so I decided to paint the entire bus in order to repair all the damaged areas and fill holes cut for a refrigerator, furnace, outlets, etc. by previous owners. As I said in an earlier post, I wanted a clean roof which required 11 holes to be patched in the roof alone. In addition there were only four bay doors that were not damaged. I wound up using all three large bay doors from the donor bus, but they still required a
Replaced, re-riveted,painted
considerable amount of dent and gouge repair, as well as removal of all the bay door pull-out handles, straightening and re-riveting. In addition there are over 80 bolt-on window and trim parts that were all removed for repair and refinishing. Two of the bay doors were rebuilt to add expanded metal for venting the air conditioning units and the remote oil cooler. In addition, I removed the front license plate assembly and grafted in a section off the donor bus to give the front a smooth, unbroken
Some of the bolt-on pieces
look. The roof was sanded down to the original,very tough green prime, re-primed and then shot with white Imron. All the bay doors were hung with new hinge rubber. We etch primed all the bolt on pieces, doors and sections as we went. All bolt-on parts were seam sealed to create a smooth,tight, unified look. It's been three months of hammering, filling, sanding, priming, more sanding. I hate sanding! It's like a bad remake of The Karate Kid - wipe on, wipe off. Filler on, sand off, primer on, sand off, and on and on...
Panel repair

Refinished latch handle


Modified front
Old front


Silver at last!